A New Beginning

photography by Mary Lou Jacobs

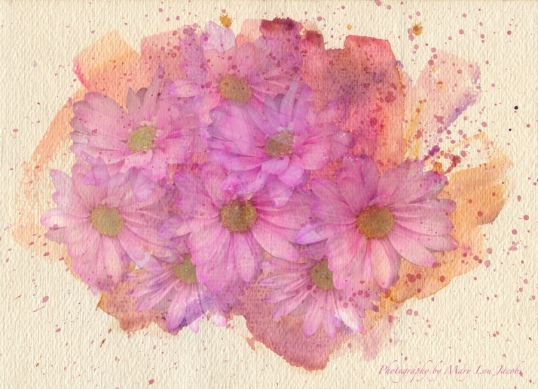
Watercolor-like Flowers

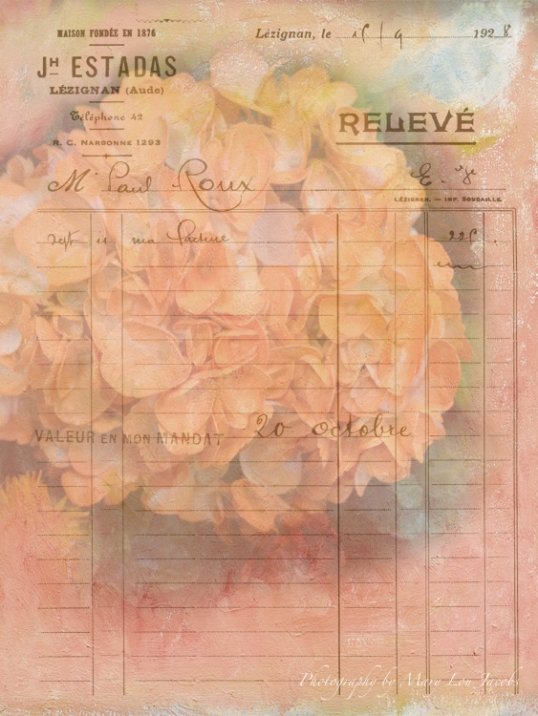
As you may already know I love working with textures and overlays. When adding them to a photograph the possibilities are unending and you will be amazed at the results. There are lots of websites that offer great free textures like Shadowhouse Creations , Lenabem-Anna’s, Rita’s Coffee Shop and many more which can be found doing a Google search. The texture and overlay that I used in this image is from French Kiss Connections and I did pay for them.

Choose your starter image and you are ready to go!!

Please click on the image to get the full view of the background.

VivacityWEB

Workflow

1.Duplicate image and do your normal edits.

2.SAVE your work several times during your editing.

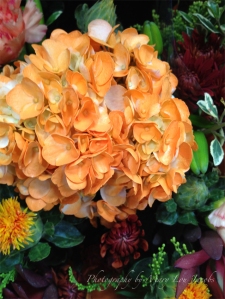
3. For this image I removed the flowers I wanted to use from the original image using the Quick Selection Tool.

4. Duplicate the flower layer several times and then rearrange the flowers and lower the Opacity to your liking.

5. Next I used French Kiss Splatter Overlay

6. You can change the color of the png overlay by following this video from French Kiss Collections.

7. Play with the Opacity and then remove the overlay from any areas where you don’t want it by using the Eraser.

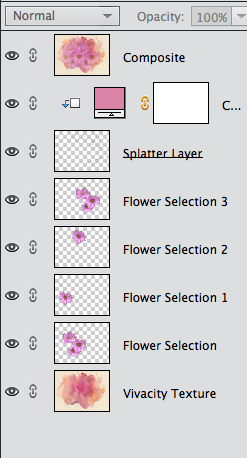
8. I created a composite layer ~  CMD + option + shift + E on a Mac or CTL + ALT + shift + E on a PC.

Here’s a screen shot of the Layers Panel.

Screen Shot Layer Panel

Please let me know if you have any questions.

Enjoy!!

As always please remember if you choose to use any of the links or tutorials on this blog that you give credit to the author.



Combination of Presets

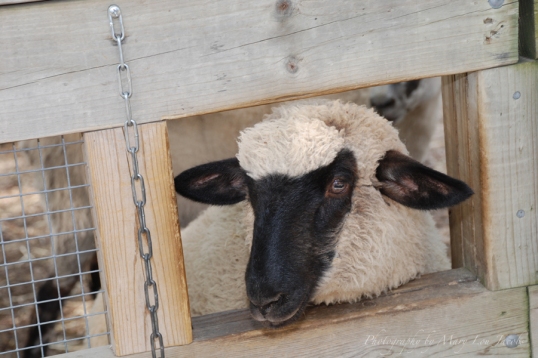
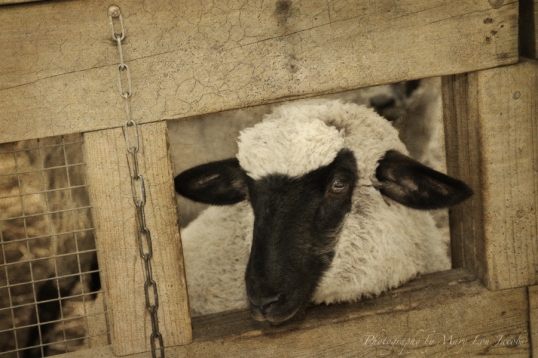
Once again Steve Rich created a workflow that peaked my interest. I thought I would give it a try on a totally different type of image than he used. This is a single shot (not bracketed) which I ran through my normal edits before applying his workflow in OnOne Perfect Effects 4.

Before SOOC

SheepORIG

After

SheepWEB

I used the following part of  Steve Rich‘s Workflow.

Five presets used from OnOne Perfect Effects 4.

Black and White Green Filter @ 50%
Vintage Postcard @ 35%
Rice Paper Vignette @ 60%
Omaha Beach @ 20%
Rich Glow @ 50%

I added a white layer mask and adjusted the Opacity in different areas while I used a black brush to remove some of the effects of the presets from the sheep.

Don’t forget to…

1. Duplicate image and do your normal edits.

2. SAVE your work several times during your editing.

3. Creeate a composite layer ~  CMD + option + shift + E on a Mac or CTL + ALT + shift + E on a PC.

Please let me know if you have any questions.

Enjoy!!

As always please remember if you choose to use any of the links or tutorials on this blog that you give credit to the author.
From Day Into Night

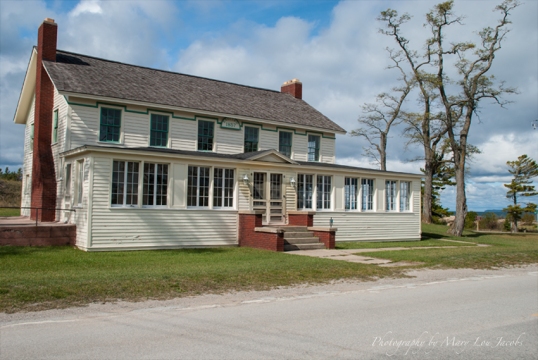
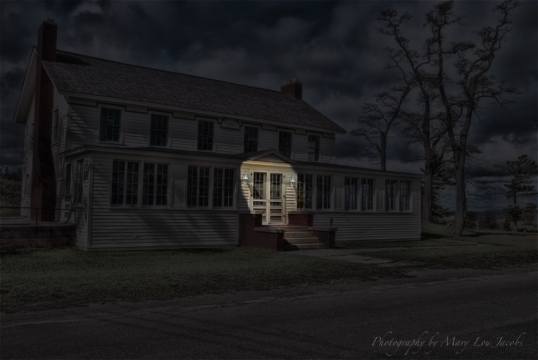
What a difference a day makes!! While this may look complicated it really is not difficult to do. The hardest part for me was getting the porch lighting to my liking. Once again a BIG thank you to Steve Rich for posting this tutorial on his blog. The tutorial is ‘Day to Night’ by Bill Fritz over at HDR One. Thank you to Bill as well.

Before

TraverseCityORIGWEB


After

TraverseCityWEB

Workflow

Follow the tutorial by Bill Fritz from HDR One.

Don’t forget to:

1. Duplicate image and do your normal edits.

2. Create a composite layer several times while working ~  CMD + option + shift + E on a Mac or CTL + ALT + shift + E on a PC.

3. Save your several times while you are working just in case!!

Please let me know if you have any questions.

Enjoy!!

As always please remember if you choose to use any of the links or tutorials on this blog that you give credit to the author.
More Texture Fun!!

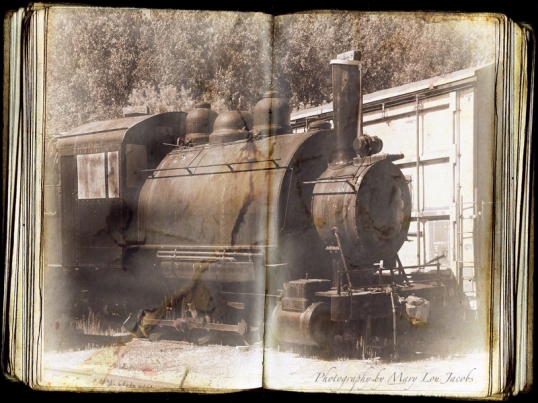
As you have figured out by now I LOVE playing with textures!! Steve Rich posted an image on Facebook using one of Lenabem-Anna’s textures. Of course I had to go right to the website to check out the FREE textures and once again I was hooked!! I choose Lenabem-Anna’s Old Book 2 texture to play with first. This is done completely inside Elements 11.

TrainBook

Workflow

1. Duplicate image and do your normal edits.

2. Choose your texture and add your image.

3. Duplicate texture and place above image. (Background layer is texture. Layer 1 is image. Layer 2 is background.)

4. Change the Blend Mode to Darken. If your image isn’t dark enough you can duplicate the layer.

5. I duplicated the top texture layer a couple of times to darken and merged the layers then changed the Blend Mode to Screen.

6. On the top texture layer I took the Eraser on lower Opacity, I used 16%, and erased some of the middle of the pages.

7. On the same layer I used the Burn Tool on the center of the pages to darken the crease and also around the edges of the book.

8. Dodge and burn other areas as desired.

9. My last step was adding a FREE paper texture from CG Textures. I changed the Blend Mode to Linear Light and set the Opacity to 27%.

I created a composite layer ~  CMD + option + shift + E on a Mac or CTL + ALT + shift + E on a PC.

Please let me know if you have any questions.

Enjoy!!

As always please remember if you choose to use any of the links or tutorials on this blog that you give credit to the author.
Photoshop Elements 11…or Not!!

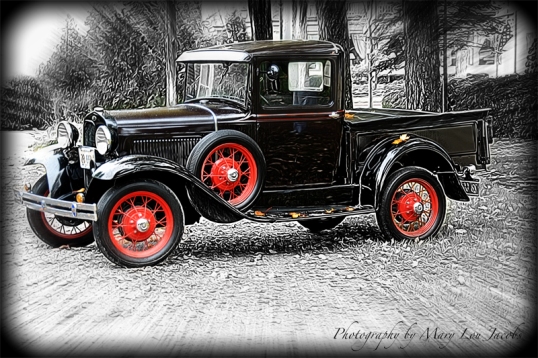
I downloaded the 30-day free trial of Photoshop Elements 11 thinking that way I could talk myself out of it!! I was doing a good job and then several of my friends posted images using the Graphic Novel filter. I thought to myself…I think I’ll just play around with it because it looks like fun. Now I think I’m hooked on getting it!!

I used the Graphic Novel filter in PSE 11 and then added a mask. I used a black brush on a white mask and painted over the car to bring back some detail. Then I took the image into Photo Effects 4 using the Radial Blur and the Edges to Black vignette.

Please let me know if you have any questions.

Enjoy!!

As always please remember if you choose to use any of the links or tutorials on this blog that you give credit to the author.
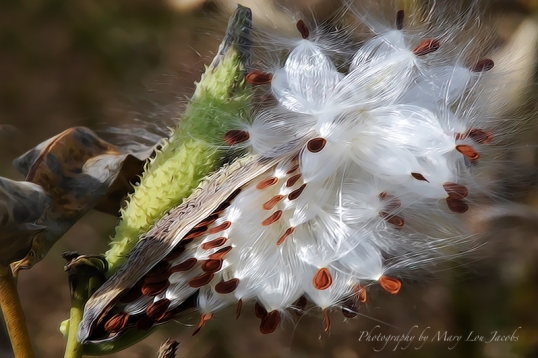
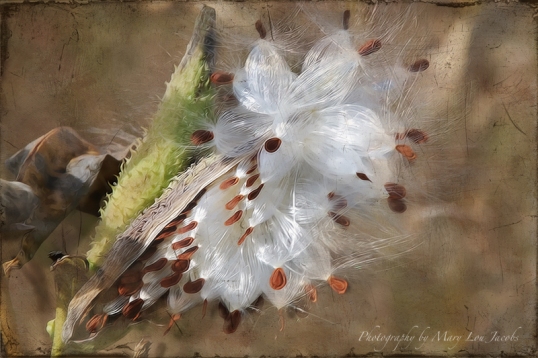
Milk Weed Pod

I dug deep into the archives for this image. This is another one that I have had for a while just waiting to find the perfect post processing for it. I’m glad I saved it!!

Before


After

Workflow

1. Duplicate image and do your normal edits. In addition to the edits I generally do I ran this through Topaz Clean using the DeGrunge Preset.

2. Pick a texture. I used French Kiss Textures Paysage texture from the Tableaux Collection.  You can find Free textures at Shadowhouse Creations, Rita’s Coffee Shop, or a Google search will find more sites.

3. The texture layer should be layer 2 and should be above the duplicated image. I left the Blend Mode at Normal and reduced the Opacity to 40%

4. Add a white mask to the texture layer and use a black brush to paint away the unwanted parts of the texture changing the opacity accordingly.

5. Add a grunge texture overlay, change the blend mode to your liking and lower the opacity. I used Multiply and lowered the opacity to 85%. If you want to change the color of the overlay, add a Color Fill Adjustment Layer and clip it to the mask so it only changes the color of the mask. These are some free Overlays from French Kiss Textures or you can do a Google search.

6. Create a composite layer ~  CMD + option + shift + E on a Mac or CTL + ALT + shift + E on a PC.

Please let me know if you have any questions.

Enjoy!!

As always please remember if you choose to use any of the links or tutorials on this blog that you give credit to the author.
Completely Inside Elements

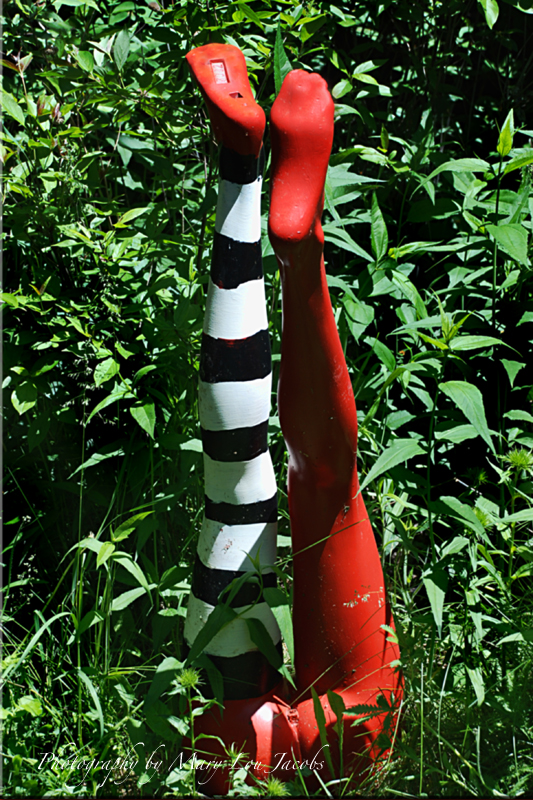
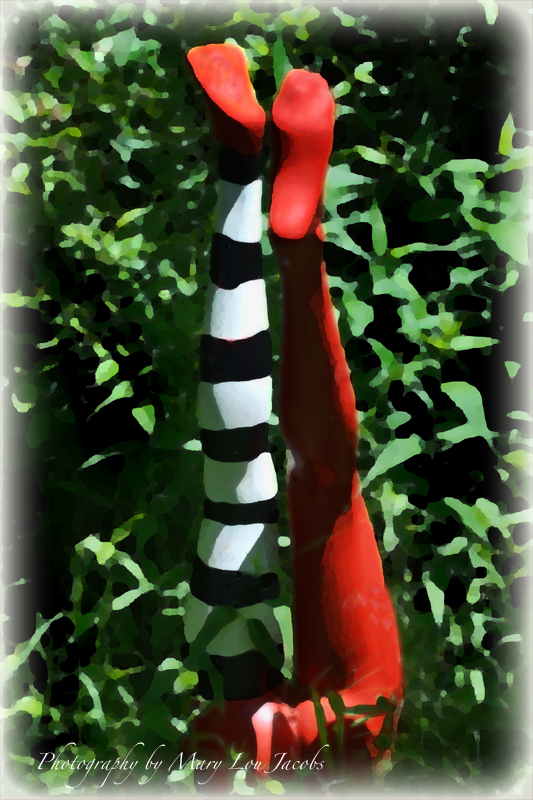
This is my newest attempt at post processing completely inside of PSE9. I never paid much attention to the Filters using them mostly to add a blur or add high pass sharpening and not using them to their full potential. The hardest part of doing this was choosing the right image. Follow along and let me know what you think!!

Original

After using Filters

Workflow

1. Duplicate image and do your normal edits.

2. Filter > Artistic > Underpainting > Brush 6   Texture Coverage 27   Texture is Sandstone    Scaling 83%    Relief 5    Light is Top

3. Add a white mask > set black as the foreground color > select a soft edge brush > brush set at Normal > Opacity 31% I brought back some of the original photograph by using the brush on the legs only

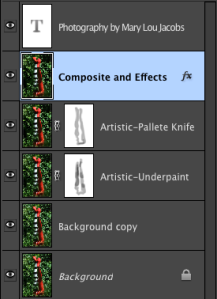
4. Create a composite layer ~  CMD + option + shift + E on a Mac or CTL + ALT + shift + E on a PC and duplicate the layer.

5. Filter > Artistic > Palette Knife > Stroke Size 37 > Stroke Detail 3 > Softness 7

6. Repeat Step 3.

7. Effects Panel > Layer Styles > Inner Glows > Simple

8. Click the ‘fx’ on the layer > Choose your settings. I used White > Size 55 px > Opacity 88%

Please let me know if you have any questions.

Enjoy!!

As always please remember if you choose to use any of the links or tutorials on this blog that you give credit to the author.
A New Challenge ~ Take 2

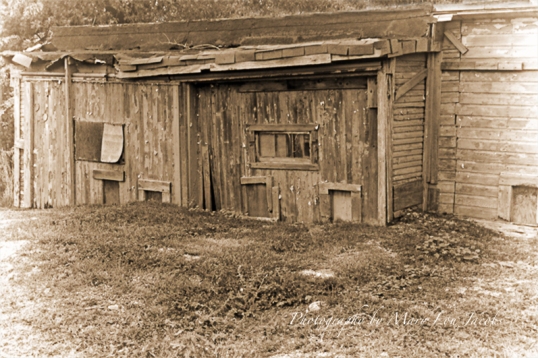
Several weeks ago I posted this image edited in PSE 9 without using any additional plugins, filters, etc. Here are a couple of images done using other methods.

I started with my usual edits and then duplicated the layer.

Next I used Topaz Labs Black and White Effects and went to the Opalyte Collection and chose the White Chocolate Effect.

I downloaded the 30-day Demo of On One Perfect Effects. After duplicating the image and doing my normal edits I clicked on the Vintage tab and chose the Modern Antique preset.

I added a Brightness/Contrast adjustment layer and lightened the image.

Please let me know if you have any questions.

Enjoy!!

As always please remember if you choose to use any of the links or tutorials on this blog that you give credit to the author.
Check Please!!

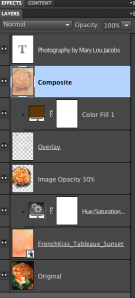
This image is quickly climbing to the top of my list of favorites!! The texture and overlay are from French Kiss Connections. I’m going to show you how I did this and also a screen shot of my Layer’s Palette. This was taken with my iPhone 4S.

Original

Not a great image but I love the orange and I wanted to do something with it. This is SOOC.

Next

1. Duplicate image and do your normal edits.

2. Choose a texture of your choice. I used French Kiss Collections Sunset from the Tableaux Collection. The texture is on Layer #2.

3. Hue and Saturation Adjustment Layer. I reduced the Saturation to -40.

4. I used the Eraser Tool and erased portions (see settings below) of the flower image without going right up to the flower creating a feathered edge around the flower. Opacity reduced to 30%. The flower layer goes above the Hue and Saturation Adjustment Layer.

5. For the finishing touches I downloaded French Kiss Collections FREE Action and Overlay. The action allows you to add color to a transparent PNG Overlay. The Vintage Check Overlay is placed above the image. Run the Action and select the color you want.

6. I created a composite layer ~  CMD + option + shift + E on a Mac or CTL + ALT + shift + E on a PC.

Screen Shot Layers Palette

That’s all there is to it. I know this seems complicated but it really is easy and allows your creativity to shine!!

Please let me know if you have any questions.

Enjoy!!

As always please remember if you choose to use any of the links or tutorials on this blog that you give credit to the author.
Falling Leaves

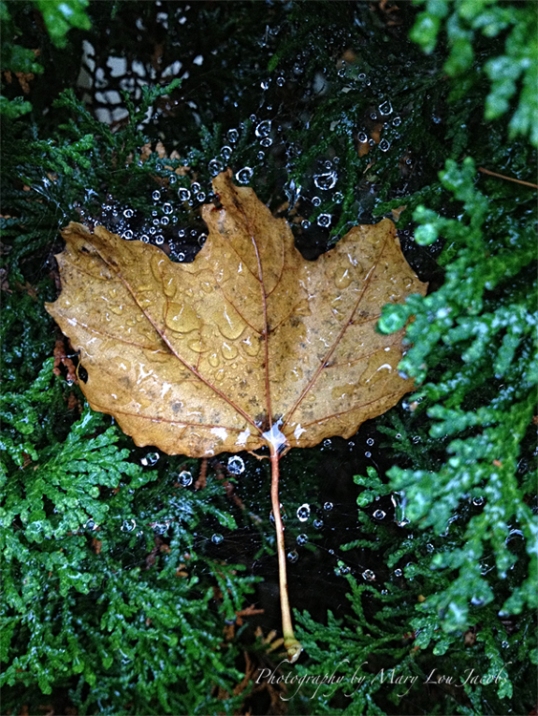
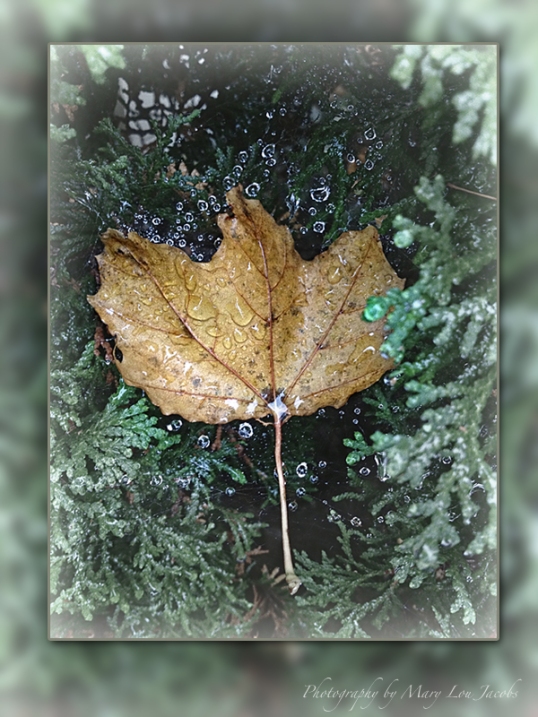
Fall is upon us and after a much needed rain my iPhone 4S and I set out to see what we could find to photograph. While talking to my neighbor I looked in her bushes and saw this web, which really isn’t very visible, with this leaf longing to have it’s picture taken!! I couldn’t decide what to do in post processing so I just played a bit.

Original

After

Workflow

1. Duplicate image and do your normal edits.

2. I chose Topaz Labs Black & White Effects . Then I chose the Opalotype Collection Effect and then the Milk Memories Preset which creates a white vignette.

3. I used the Finishing Touches Tab and made my adjustments to the vignette. When I was finished I clicked OK and returned to PSE9.

4. I added a mask to the completed Topaz Black & White Layer. The mask should be white and be sure the mask is highlighted.

5. Make sure the default foreground color is black. To do this you can use the “D” on your keyboard or  click on the arrow above the default colors.

6. Choose a soft paint brush and with black as the foreground color carefully paint on the white mask to reveal any colors you want to show through from the layer underneath. You can change the opacity of the brush to reveal more color or less color.

7. Create a composite layer ~  CMD + option + shift + E on a Mac or CTL + ALT + shift + E on a PC.

8. Save your PSD file, if you choose to. I always save it.

9. Save your image as JPG.

9. I then added  Steve Rich’s MJ Blur Action by opening up the JPG file and running the action.

Please let me know if you have any questions.

Enjoy!!

As always please remember if you choose to use any of the links or tutorials on this blog that you give credit to the author.
Post Navigation